
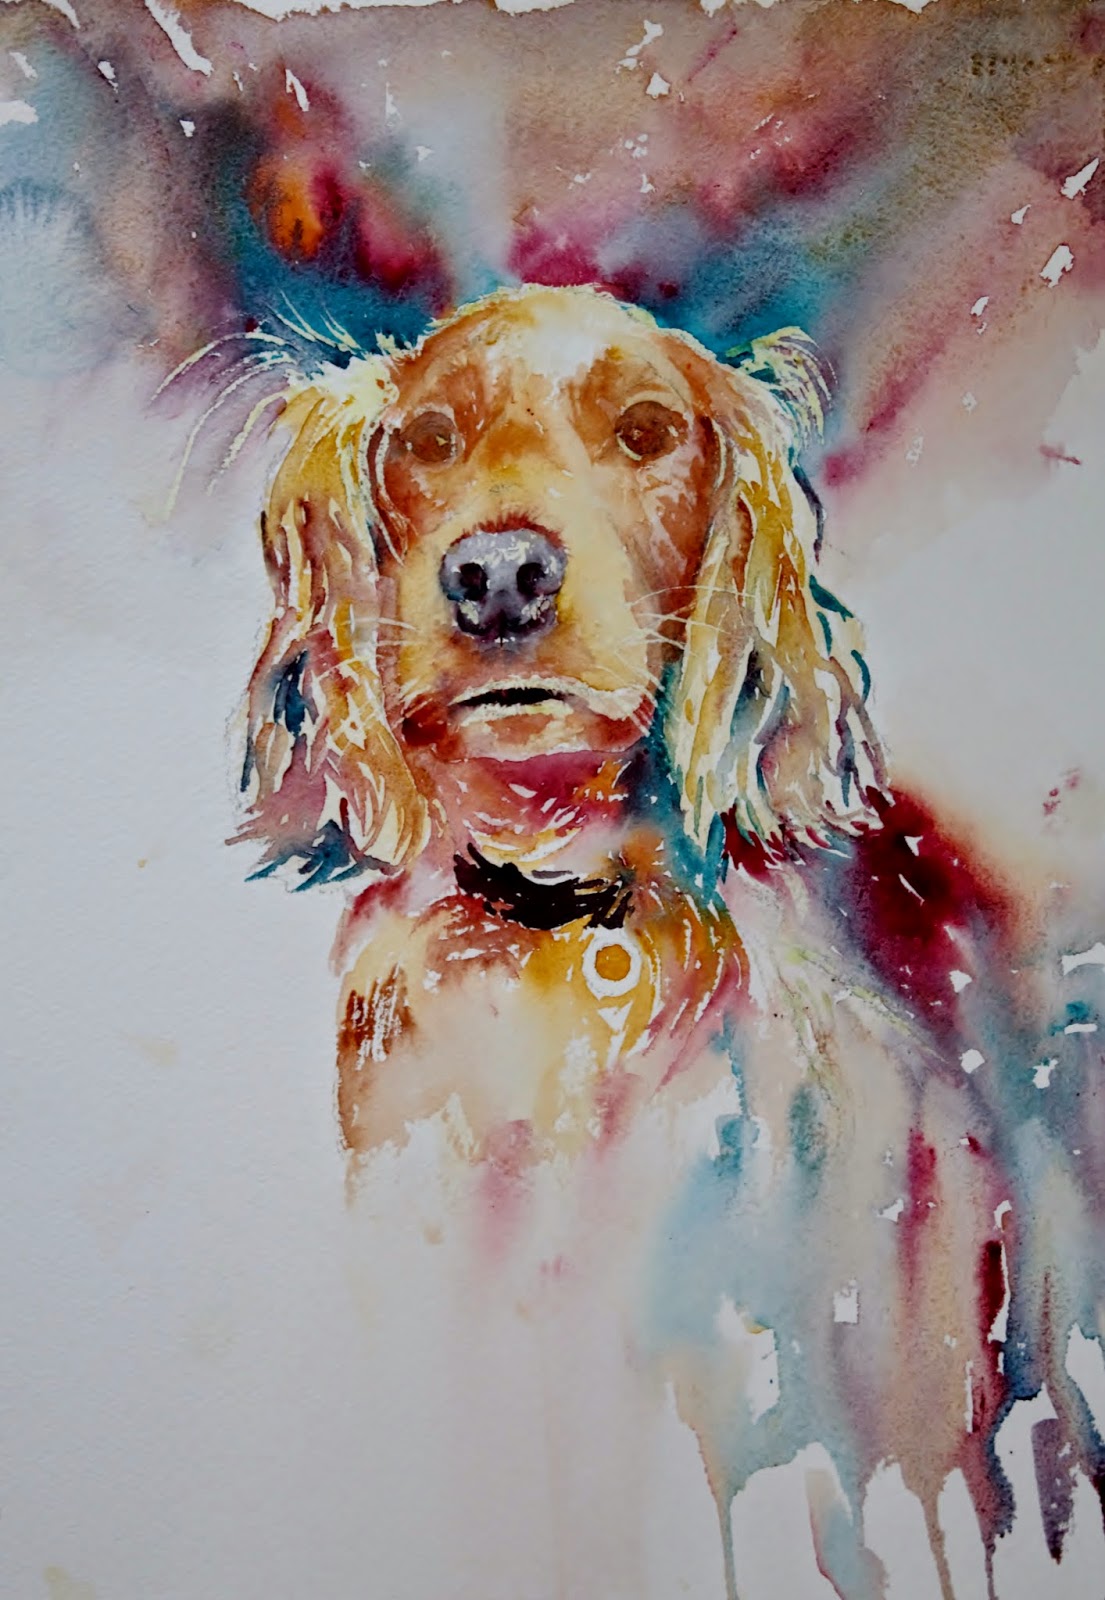
We have a lot of lovely photos of Archie (he is a very photogenic golden cocker spaniel and of course we aren't at all biased!!) but his "mum" Steph took this one... she takes the best photos of him and I really loved this one!!!
I had an attempt at painting him nearly 12 months ago but wasn't at all satisfied with the colour as I hadn't been able to inject anything different which is why I am a lot happier with this one.

I sketched the outline, positioning the eyes nose and mouth and though I don't normally use masking fluid preferring to reserve the whites I did pick out the highlights on this... his fur has blond highlights and I didn't want to leave to the end and pick out with white paint as there is too much.
First step of painting was to pick out the eyes and nose and add paint wet in wet to areas of the face. Little tip for both eyes and nose from Jean Haines is to let the colour bleed sightly into the face which helps to make them part of the face.

Next was to add the backround. the colours I have used are all W&N artists quality, the paper is Arches rough 140lb.
Colours
Pthalo Turq (this is a good rich colour which will give a good range of tonal value)
Burnt Sienna
Alizarin Crimson
Raw Sienna
I tested the colours with a planet and decided the turquoise was a good addition to lift the colours to create something a bit more unusual. The first painting I did was unimaginative as I stuck to the colours as I saw them so am happier with this palette.
The background was a mix of all 4 colours, added wet on dry and allowed to mingle on the paper. As I didn't want any green in this I tried not to place the blue next to the yellow. I also added a bit more detail under his chin and on his chest introducing some of the turquoise here and there. Where I wanted good darks I used the turq, aliz crimson and burnt sienna picking up almost neat paint mixed together on the brush. There isn't really any magical formula as to where I add which colour other than I am always looking to add variety while keeping things in harmony.

Here I have started to build up the ears...... the paint
has been applied with a drier brush so that I start to get
the texture there rather than a smooth velvety look as on his face were
his fur is much shorter. I also work a little around his face trying to keep the edges soft where I can building up some depth of colour.

Next I added the collar, a little more detail to the eyes and a bit more building up on the face. Again there is nothing too scientific about how I move around the painting other than I make sure the paint is dry before I work in that area again.
%2Bc.jpg)
Here I decided to add a bit more background to the left.... might decide that doesn't look right but I have now committed to it!! I worked on his muzzle with some raw sienna and soften the areas below his nose.
c.jpg)
As his face was now wet I darkened the background above his head which brings his head more forward and when dry I worked around his face. I also removed the masking fluid at this stage so I could work more around his mouth, nose and eyes.
c.jpg)
I didn't like the mouth so worked on it a bit more here..I built up by looking at the tone on the image and adding the darks where I see them. I also lifted colour out above his left eye and between his eyes. A bit of work on his nose here too...I had used some masking fluid on his nose but it needed blending... often a problem with masking fluid as it leaves harsh lines and needs softening.
c.jpg)
More work now on his ears and around his face.... at this stage it is the finishing touches which need adding and I spend a lot of time just looking and often take photos as things often become clearer when viewed on screen. I worked more on the eyes and nose and it is often only a very tiny touch of paint here and there as I am trying to improve the likeness and fine tune the shapes. I have added a touch more to the bg to the right, again not sure about this area and feel it may need something else but I think I am going to leave it for the time being.
c.jpg)
I left it overnight and after a bit more tweaking around the mouth think I will be calling it a day!!

Je hebt de ogen goed neer gezet prachtig en leuk om te zien hoe je een hond ook met veel kleur kan neer zetten lieve groetjes Daniëlle
ReplyDeleteThe eyes are so important for a portrait and I just wanted to inject a bit more colour so delighted you like Daniel!!
DeleteAbsolutely loved this step by step - the changes from picture to picture are great. I just love those whiskers! And the colour choice for the background - makes me think of Superman :) Archie the Superdog!
ReplyDeleteHe is a bit of a superdog Carmen... sooo intelligent as well as looks!! I just wanted to do something a bit different and thought the blue would work well with the orangey browns as they are compliments, the whiskers were also masked, forgot to put that bit in.....
DeleteIt really works - he looks amazing! I love the effect, the background is perfect for how how character comes across.
DeleteI love the background (and the dog!) and the way you have put some of the background colour into the dog. I'm not afraid of painting colourful animals but always chicken out of painting a background - must be braver!
ReplyDeleteI teach how to paint backgrounds Jan... I agree they can be scary but not once you know how to do them and it always helps to have the colours echoed around the painting as you mentioned. I often let the subject bleed into the bg so that subject and background become one,though not in this case apart from the loose bit towards the bottom.
DeleteYou have really captured his expression, lovely work :-)
ReplyDeleteThanks Ann he is such a lovely character and such a great photo, I'm delighted you think I captured him!!
DeleteHe looks a delight Judith
ReplyDeleteHe is Lorraine, such a loving little pup and full of fun too, we have a lovely time with him, then give him back!!
DeleteI really enjoyed meeting Archie, as I have heard so much about him. Your step by step is very interesting - it's like listening to your arty brain ticking over. Your painting of him is lively and alive, if you know what I mean. Not just a picture. Thank you for sharing your method with us.
ReplyDeleteAw thanks Polly... that is the secret to a painting... to try and make it seem more than the image, so am really pleased you think I have done that!! As for the step by step, I try and verbalise my thoughts as I do in a workshop aiming to take the mystery out of it. It isn't rocket science, it just needs practice and once you get a feel for the paint and water life becomes much easier.....the creativity can then creep to the surface when you aren't thinking about technique all the time and wondering what the heck the paint is going to do next!!
Delete