
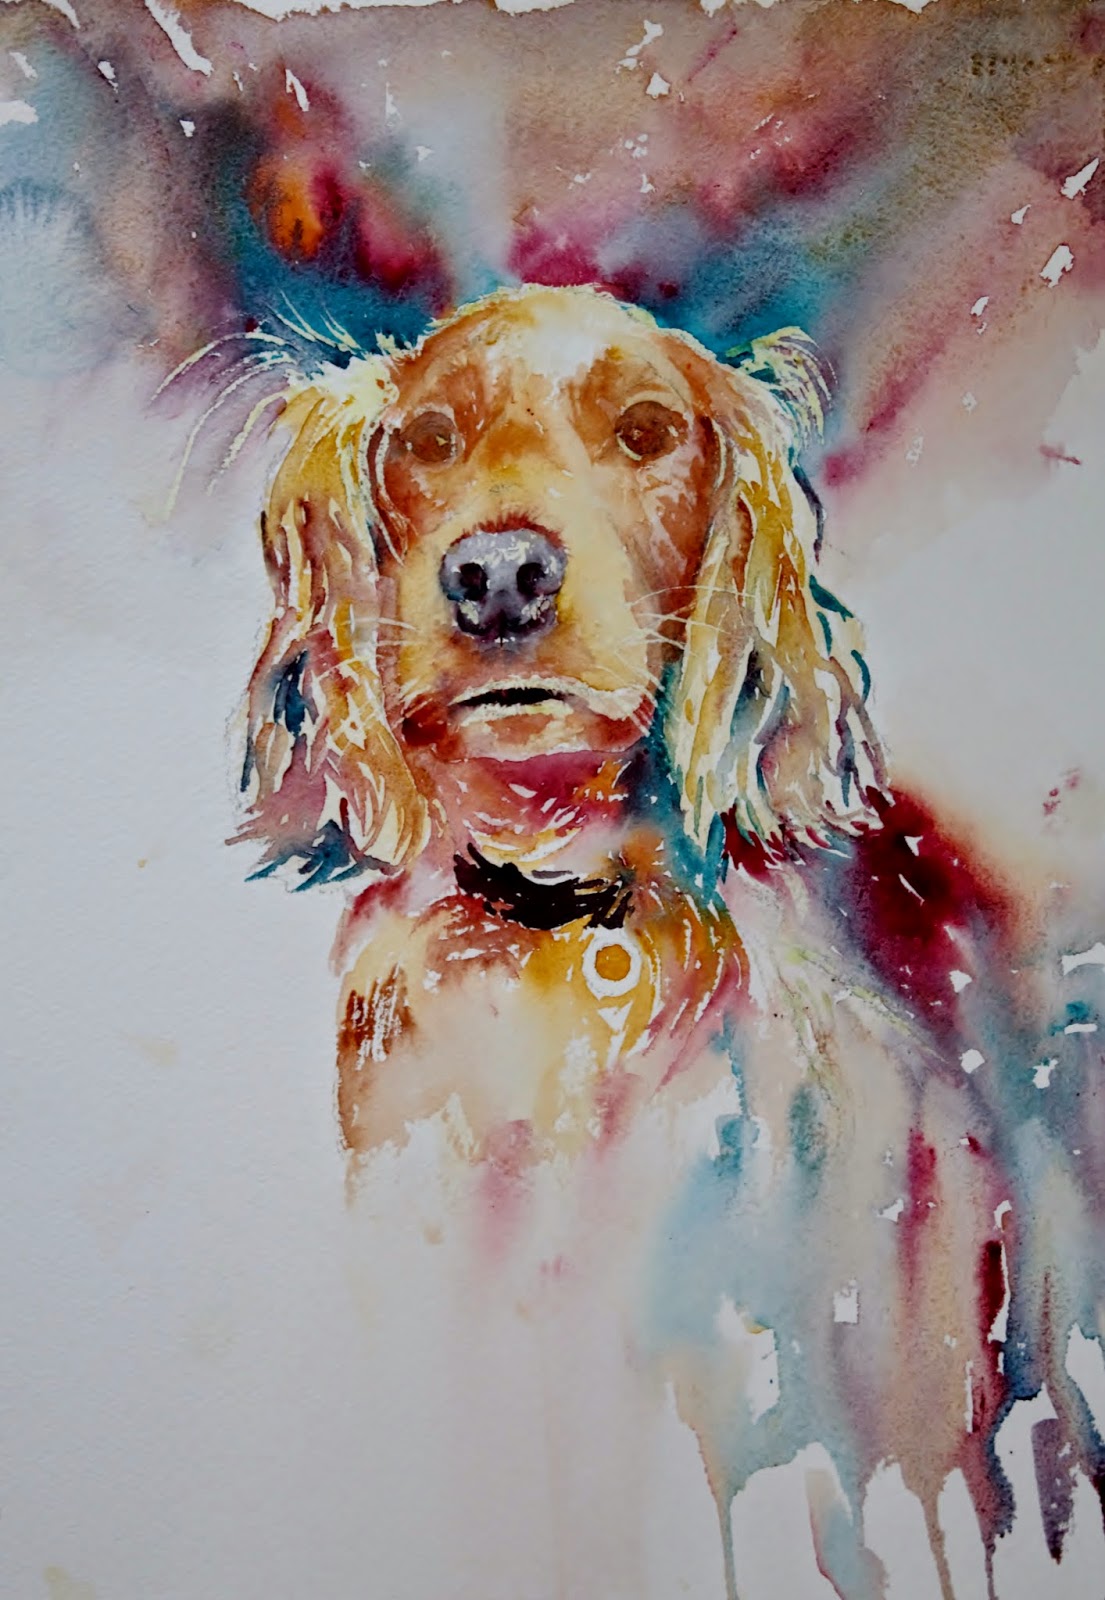
We have a lot of lovely photos of Archie (he is a very photogenic golden cocker spaniel and of course we aren't at all biased!!) but his "mum" Steph took this one... she takes the best photos of him and I really loved this one!!!
I had an attempt at painting him nearly 12 months ago but wasn't at all satisfied with the colour as I hadn't been able to inject anything different which is why I am a lot happier with this one.

I sketched the outline, positioning the eyes nose and mouth and though I don't normally use masking fluid preferring to reserve the whites I did pick out the highlights on this... his fur has blond highlights and I didn't want to leave to the end and pick out with white paint as there is too much.
First step of painting was to pick out the eyes and nose and add paint wet in wet to areas of the face. Little tip for both eyes and nose from Jean Haines is to let the colour bleed sightly into the face which helps to make them part of the face.

Next was to add the backround. the colours I have used are all W&N artists quality, the paper is Arches rough 140lb.
Colours
Pthalo Turq (this is a good rich colour which will give a good range of tonal value)
Burnt Sienna
Alizarin Crimson
Raw Sienna
I tested the colours with a planet and decided the turquoise was a good addition to lift the colours to create something a bit more unusual. The first painting I did was unimaginative as I stuck to the colours as I saw them so am happier with this palette.
The background was a mix of all 4 colours, added wet on dry and allowed to mingle on the paper. As I didn't want any green in this I tried not to place the blue next to the yellow. I also added a bit more detail under his chin and on his chest introducing some of the turquoise here and there. Where I wanted good darks I used the turq, aliz crimson and burnt sienna picking up almost neat paint mixed together on the brush. There isn't really any magical formula as to where I add which colour other than I am always looking to add variety while keeping things in harmony.

Here I have started to build up the ears...... the paint
has been applied with a drier brush so that I start to get
the texture there rather than a smooth velvety look as on his face were
his fur is much shorter. I also work a little around his face trying to keep the edges soft where I can building up some depth of colour.

Next I added the collar, a little more detail to the eyes and a bit more building up on the face. Again there is nothing too scientific about how I move around the painting other than I make sure the paint is dry before I work in that area again.
%2Bc.jpg)
Here I decided to add a bit more background to the left.... might decide that doesn't look right but I have now committed to it!! I worked on his muzzle with some raw sienna and soften the areas below his nose.
c.jpg)
As his face was now wet I darkened the background above his head which brings his head more forward and when dry I worked around his face. I also removed the masking fluid at this stage so I could work more around his mouth, nose and eyes.
c.jpg)
I didn't like the mouth so worked on it a bit more here..I built up by looking at the tone on the image and adding the darks where I see them. I also lifted colour out above his left eye and between his eyes. A bit of work on his nose here too...I had used some masking fluid on his nose but it needed blending... often a problem with masking fluid as it leaves harsh lines and needs softening.
c.jpg)
More work now on his ears and around his face.... at this stage it is the finishing touches which need adding and I spend a lot of time just looking and often take photos as things often become clearer when viewed on screen. I worked more on the eyes and nose and it is often only a very tiny touch of paint here and there as I am trying to improve the likeness and fine tune the shapes. I have added a touch more to the bg to the right, again not sure about this area and feel it may need something else but I think I am going to leave it for the time being.
c.jpg)
I left it overnight and after a bit more tweaking around the mouth think I will be calling it a day!!
