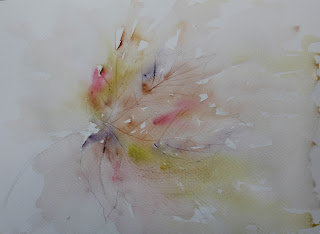
However, I am not too hopeful.... we do have fallen leaves in the area but they are all still green, with some turning slightly yellow so rather disappointing display at the moment....never mind, we will just have to "make it up" as I have with the colours on this step by step.
My leaf was still green so I just used it as a template for the shape and drew around it. In my classes I find this is the easiest way for the students to get a good result. Sycamore leaves do have a distinctive form and if they try to draw freehand they may not get the proportions quite right and even if they then do a fabulous painting they will still be disappointed with the final piece as the drawing wasn't right on the first place.
The colours I chose for this were Alizarin Crimson, Green Gold, Burnt Sienna and Purple
Colours all mixed on the paper, plenty of water, edges lost into the background and with my finger nail I have scratched in the veins. Then left to DRY!!
Now I can start to add some hard edges around the leaf so as you can see some are positive and some are negative with still plenty of lost and some soft edges too. The key to painting like this is not to add too much all at once and even where you do add an edge it is still possible to break the line you have just added. It is also possible to lose your edge completely if you feel you have added in the wrong area. Bit of splattering to the right of the painting... always helps to create a loose feel. Now I leave to DRY.
Next I have just worked in the centre adding a bit more paint to the body of the leaf... guess what, yes leave to DRY.
Here I have started to add a few more edges and this is where it is really difficult to verbalise how you should go about it. I have added a positive edge top right, slightly broken and added a negative edge just below right of centre. I have also darkened around the stem. I am trying to create the form of the leaf without adding every edge and and there is no right or wrong to doing this. If you want to create light then you will need fewer edges and then just faint ghostly ones. But if I was doing a full piece I would take time to assess what the painting needs and usually I place them on my sofa so I can see them both close up and from a distance and bit by bit it tends to become clearer where the composition needs work. This is also where it becomes difficult to say when the painting is complete and that varies greatly from individual to individual and again there is no right or wrong.
Here I have darkened around the centre of the leaf where the stem meets it and I also felt it needed a touch more paint where I had added the negative purple paint mid right (where you can see it is still wet) and I have also added a few more splatters. I think I will leave it there, I could work on it for hours yet adding more and more paint but I'm not sure if I would improve it and again if I wanted to do a "proper painting" I would still leave it now and maybe look at it again in the morning.
Just by adding little touches here and there, there is far less risk that you will ruin your work... it is when you go in heavy handed doing too much at once that you may take the piece beyond the point of no return. Here any little edge I have added can easily be both extended if I like or washed away quickly if I feel it doesn't work.
Would appreciate any comments to let me know if you feel that this has been explained well enough and has helped... would also love to hear if any of you have a go!!


